No-Bake Cheesecake Cups
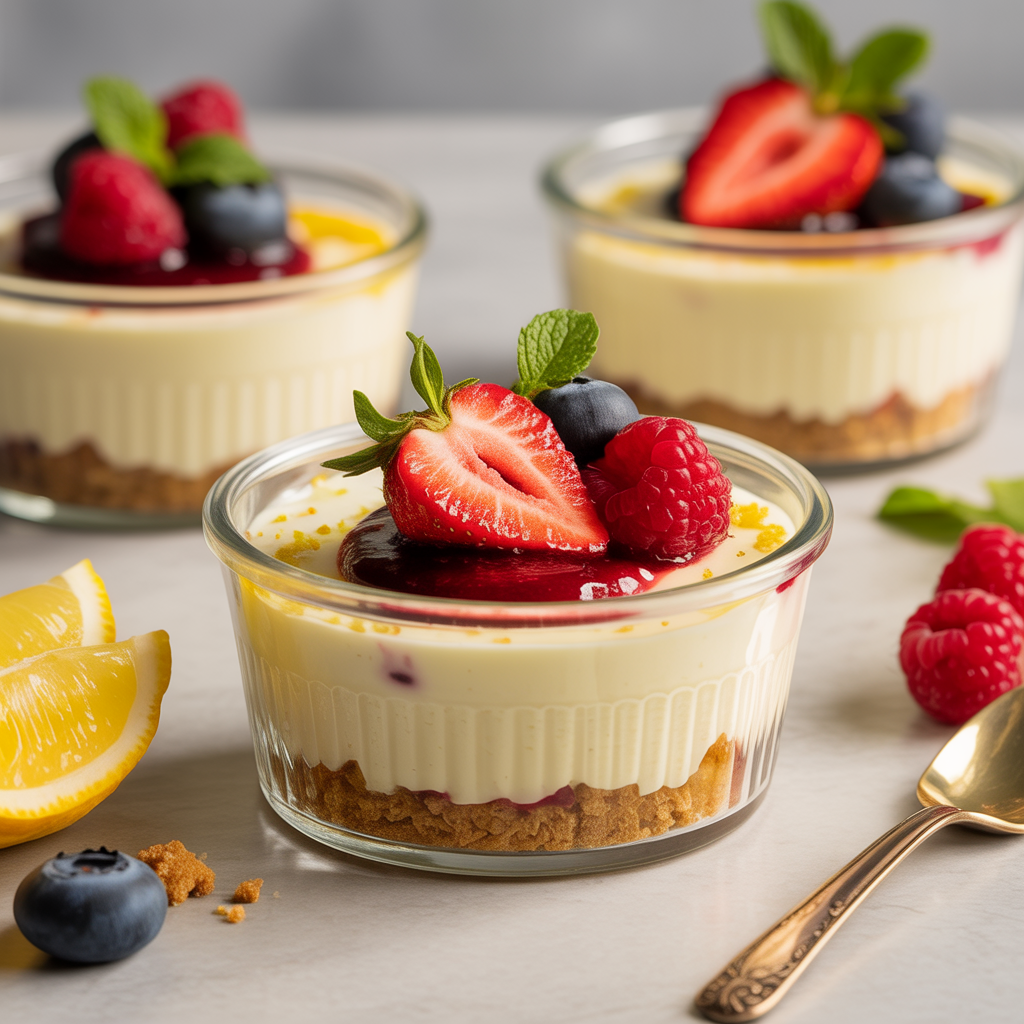
Looking for an indulgent, crowd-pleasing sweet? These No-Bake Cheesecake Cups are a perfect entry in your list of yummy dessert recipes. Light, creamy, and quick to assemble, they’re ideal for parties, weeknight treats, or make-ahead desserts. With a crisp graham cracker base and a tangy cream cheese filling, they hit the sweet spot without ever firing up the oven.
Recipe At a Glance
- Prep time: 20 minutes
- Chill time: 2 hours (minimum)
- Cooking time: 0 minutes (no-bake)
- Total time: 2 hours 20 minutes
- Servings: 8–10 cups
- Cuisine: American / Dessert
Ingredients
- 1 1/2 cups graham cracker crumbs (about 10–12 full crackers) — or use crushed digestive biscuits
- 4 tbsp unsalted butter, melted
- 2 tbsp granulated sugar
- 16 oz (450 g) cream cheese, room temperature
- 1/2 cup powdered sugar, sifted
- 1 tsp vanilla extract
- 1 cup heavy cream, cold (or whipping cream)
- 2 tbsp lemon juice (optional, for brightness)
- Pinch of salt
- Fresh berries, fruit compote, chocolate shavings, or caramel for topping
Equipment
- Mixing bowls
- Electric hand mixer or stand mixer
- Spoons or small offset spatula
- 8–10 small serving cups, ramekins, or a muffin tin with liners
Step-by-Step Instructions
- Make the crust: In a medium bowl combine graham cracker crumbs, melted butter, and 2 tbsp sugar. Stir until crumbs are evenly moistened. Divide the mixture among your serving cups, pressing down with the back of a spoon to form a compact base (about 1–2 tablespoons per cup). Chill in the fridge while you prepare the filling.
- Beat the cream cheese: In a large bowl, beat the room-temperature cream cheese with an electric mixer on medium speed until smooth and free of lumps (about 1–2 minutes). Add powdered sugar, vanilla extract, lemon juice (if using), and a pinch of salt; beat until incorporated.
- Whip the cream: In a separate chilled bowl, whip the cold heavy cream to soft peaks using clean beaters. Be careful not to overbeat; you want a light, billowy texture.
- Fold together: Gently fold one-third of the whipped cream into the cream cheese mixture to lighten it, then carefully fold in the remaining whipped cream until fully combined and smooth. Keep the mixture airy to ensure a light no-bake texture.
- Assemble the cups: Spoon or pipe the cheesecake filling over the chilled crusts, leaving a little space at the top for toppings. Smooth the surface with a spoon or offset spatula.
- Chill: Refrigerate the assembled cups for at least 2 hours, or until the filling is set. For best texture and slice-like firmness, chill 4 hours or overnight.
- Finish and serve: Top with fresh berries, fruit compote, lemon curd, chocolate ganache, or a dusting of cocoa powder just before serving. Serve chilled.
Chef Tips
- Use full-fat cream cheese and cold heavy cream for the creamiest texture—low-fat versions can make the filling runny.
- For smoother filling, beat the cream cheese well to remove all lumps before adding sugar.
- If you prefer a firmer base, mix in 1–2 tablespoons of melted chocolate with the crust or press the crust more firmly and pre-chill it longer.
- Make it ahead: assemble the cups and store them covered in the refrigerator for up to 48 hours. Add fresh toppings just before serving to keep them vibrant.
Variations
- Oreo Cheesecake Cups: Swap graham crumbs for crushed Oreos (use melted butter as usual).
- Lemon Cheesecake Cups: Add 1–2 teaspoons lemon zest and 2–3 tablespoons lemon curd on top.
- Chocolate Cheesecake Cups: Fold 1/3 cup sifted cocoa powder into the filling and top with chocolate shavings.
- Light Version: Substitute half the heavy cream with full-fat Greek yogurt (note: texture will be slightly different).
Storage and Reheating
No-bake cheesecake cups are best kept refrigerated. Store in an airtight container or cover the individual cups with plastic wrap.
- Refrigerator: Up to 48 hours for best texture and flavor.
- Freezer: Freeze un-topped cups for up to 1 month. Thaw overnight in the refrigerator. Add fresh toppings after thawing.
- Reheating: These are meant to be served chilled—avoid reheating. If you prefer a softer texture, let sit at room temperature 10–15 minutes before serving.
Nutritional Information (Approximate per serving — yields 10)
- Calories: 290 kcal
- Fat: 20 g
- Saturated Fat: 12 g
- Carbohydrates: 22 g
- Sugar: 16 g
- Protein: 5 g
- Sodium: 150 mg
Nutrition varies with toppings and exact ingredient brands—use this as an estimate for planning.
Frequently Asked Questions
Can I make these ahead of time?
Yes. Assemble the cups and chill them up to 48 hours in advance. Add fresh toppings right before serving to keep them bright and fresh.
Can I freeze no-bake cheesecake cups?
Yes. Freeze unsauced, untopped cups in an airtight container for up to 1 month. Thaw in the refrigerator overnight. Add toppings after thawing to avoid sogginess.
How do I get a very smooth filling?
Beat the cream cheese until completely lump-free before adding sugar or cream. Use room-temperature cream cheese and a fine-mesh sieve for powdered sugar if needed. Gently fold in whipped cream to keep the texture light.
Can I make mini cheesecakes without an electric mixer?
Yes, but it will take more elbow grease. Use a sturdy whisk and ensure cream cheese is very soft. For best results, chill the fillings longer if mixing is imperfect.
Conclusion
No-Bake Cheesecake Cups deliver a simple, elegant dessert that fits perfectly into any repertoire of yummy dessert recipes. They’re quick to assemble, endlessly customizable, and always a hit at gatherings. Try the variations, experiment with toppings, and don’t forget to share your results. If you loved this recipe, sign up for my newsletter for more easy, no-fuss desserts and weeknight sweets.
Enjoy—then come back and tell me which variation was your favorite!